

Call us on 1300 722 491 to speak to one of our friendly team who will be happy to assist you.
You can also view and download machine operator and parts manuals.
Prevent premature wear and ensure correct shank breakout by identifying and purging air from your hydraulic system.
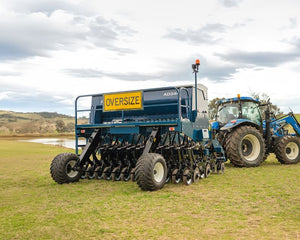
This process is applicable only for Agrowplow hydraulic shank deep rippers with a single outlet on the hydraulic cylinder. This includes (but not limited to) the AP11, AP31, AP51, AP71, AP81, and AP91 hydraulic plough models.
Note: This procedure is not relevant for the APx2 range of hydraulic ploughs with dual outlets on each cylinder. Please consult the APx2 Operators Manual for the relevant procedure.
Plough hydraulic systems require consistent hydraulic pressure to ensure the shanks break out at the correct pressure. Air can be introduced into the system through normal use and should be purged regularly. As air builds in the hydraulics, it causes the shanks to break out more frequently. It can also cause premature wear in the hydraulic cylinders and in some cases cause the end caps on the cylinders to break.
Refreshing the oil from the tractor will allow correct breakout operation.
Air should be purged from the hydraulics as part of your pre-season setup and as part of your daily pre-operational checks. If done regularly, this process should only take a few minutes prior to using the ripper.
Please always inspect and confirm that the hydraulic system is bled. Below are some hints on how to inspect for air in a closed-circuit hydraulic system.
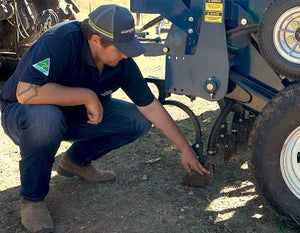
If the shank can be pushed back easily, there is a good chance there is air in the system.
Another indication is that the end caps of the cylinders can be broken. This will only happen if there is air in the system and the flow restrictor can not work properly.

Air in the hydraulic system can cause the hydraulic cylinder caps to break.
A correctly primed hydraulic system will have very little travel.
If the shank is tight and can not be moved further back than a couple of inches and a tapping sound can be heard at the top of the shank, this means the system is charged.

If you can break the shanks back by pushing on the blade with your foot, a hydraulic purge is required.
Ensure your tractor and plough are parked on flat, level ground such as turf with the tractor park brake engaged. Do not perform this operation on a hard surface such as concrete, as this will not provide enough surface for the plough blades to catch and gain sufficient leverage to break back while still supporting the weight of the frame.


Call us on 1300 722 491 to speak to one of our friendly team who will be happy to assist you.
You can also view and download machine operator and parts manuals.