
Call us on 1300 722 491 to speak to one of our friendly team who will be happy to assist you.
You can also view and download machine operator and parts manuals.
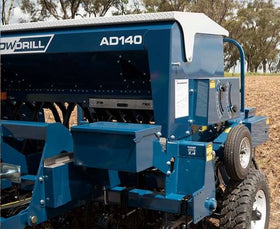
Correct calibration of your AD140 or AD130 seed drill will improve metering and result in more cost-efficient sowing.

The below steps will aid you in calibrating the main seed and fertiliser box of your AD140 or AD130 seed drill.
TIP: There are a number of factors that influence sowing rates. These tables are offered as a guide only; your machine may need slightly different settings. We recommend you calibrate your machine according to the following instructions and re-check the results after a hectare with the metering system to ensure consistent and accurate results.
|
Seed/fertiliser |
Gate setting |
Restrictors fitted |
| Lupins | 1 | None |
| Barley | 0.6 | 2 of 4 |
| Oats | 0.8 | None |
| Wheat | 0.6 | 2 of 4 |
| Sorghum | 0.6 | 2 of 4 |
| Canola | 0.2 | 3 of 4 (leave fine tooth exposed) |
| Sub clover | 0.2 | 3 of 4 (leave fine tooth exposed) |
| Lucerne | 0.2 | 3 of 4 (leave fine tooth exposed) |
| Ryegrass | 0.2 | 2 of 4 |
| Single super | 0.8 | None or 2 of 4 |
| DAP | 0.6 | None or 2 of 4 |
| Urea | 0.6 | 2 of 4 |

The roller gate adjustment levers are located on the right-hand side of the machine. They can be adjusted by rotating the handle anticlockwise to loosen the handle, then sliding the lever to the desired setting. Once in place, rotate the handle clockwise to lock it in place.

NOTE: The gate setting levers allow broad calibration changes, usually based on seed type and size. Do not adjust gate settings to increase the application rate . This can be adjusted using the rate adjustment levers, which allow for much more precise changes.
The fluted seed rollers have a fine and a coarse side. This design allows both small and large seeds to be accurately metered. Apply restrictors by positioning them sideways above the seed roller and twisting them into place in the adjustable stoppers. There should be an audible click as they are positioned.

To reposition a restrictor:
The rate adjustment levers can be found on the left-hand side of the machine. Adjust the front and rear hoppers with the levers closest to the front and the rear of the machine. To adjust the rates, rotate the handle anticlockwise to loosen and slide the lever up and down to the desired setting. Once in place, rotate the handle clockwise to lock it in place.


NOTE: This chart is a guide only. Seed sizes can vary between varieties, from season to season, and crop to crop. Oaten and barley varieties in particular, can also be affected by the cleanliness of the sample. Always check the application rate prior to sowing.
Once the sowing rate has been set, you need to measure the actual volume of product being passed through the seed rollers in order to adjust the sowing rate to your target output.
What you will need:
Weigh and Calculate:


|
|
AD140 Model |
10 rows |
12 rows |
16 rows |
20 rows |
| Sowing rows | 10 x 150mm | 12 x 150mm | 16 x 150mm | 20 x 150mm |
| Sowing width | 1.5m | 1.8m | 2.4m | 3.0m |
| FarmScan pulse metres | 1.303 | 1.303 | 1.303 | 1.31 |
| Collect from no. of hoses | 5 | 5 | 5 | 5 |
| Crank handle turns | 51 | 43 | 64 | 51 |
| Calibration factor | 0.200 | 0.240 | 0.160 | 0.200 |
NB: Calibration figures are also applicable to the AD130
Place a known amount of seed in the hopper and calculate the expected area to be covered with this quantity of grain. Review the application rate by sowing that area and confirming the correct amount of seed has been sown.
Click here to learn how to Calibrate the Small Seeds Box

Call us on 1300 722 491 to speak to one of our friendly team who will be happy to assist you.
You can also view and download machine operator and parts manuals.